This is the Final session:
Creating the DVD's with Labels!
These 4 Sessions are for Seniors who have created a Picture Folder with edited pictures and are ready to begin the process of making their Super Slide Show.
Preparation started in May and included scanning pictures, copying pictures from folders, learning to use a DVD-R and getting background music for the project. This must be completed and all edited pictures for the project located in a folder on a
DVD-R by September 1st 2015.
We have are large group interested in these Sessions in September and it is important to plan your Project.
Preparation Period:
May 1st, 2015 to August 31st, 2015
1. Gather pictures to include in your Project.
A. Printed ones to Scan to digital.
B. Digital pictures from a camera or computer.
C. Accumulate them in a New Folder called "Project".
D. Arrange them in order by re-numbering (If necessary).
E. Edit pictures to improve with Photo Gallery (Straighten, Crop and Fine Tune).
F. Copy the "Project" folder to the DVD-R disk using the USB format option.
If you need help in completing any of these procedures, please ask questions and get help.
When you have the DVD with your pictures on it, you are ready for the 4 Sessions.
We will not add or edit pictures in September.
Slide Show Creation Period:
September 8th, 2015 to September 29th, 2015
1. Add the pictures from the DVD and save as a MOV file on the DVD.
2. Type in a Title for starting slide.
3. Select the font you will use and size and background color.
4. Create the theme for the presentation.
5. Add Captions on pictures that you want displayed.
6. Add background Music.
7. Show your Slide Show to the group to review.
8. Burn the file to a new DVD (Provided).
9. Create a label for the DVD.
Here is what I have done for My Project so far.
My Granddaughter's Wedding February 28th 2015.
Gathered all the pictures that I could from cameras , phones and printed copies.
Some came by E-mail. The printed ones were scanned to digital. I renamed all the files to numerical in the order I wanted.
I merged them into a file folder "Project" in my picture library.
I am currently (June 11th) editing in Photo Gallery to Straighten. Crop and Fine Tune the pictures.
When competed, I will transfer the folder to the my DVD-R disk.
After completing the Creation Project, this is a tentative "Label" for the DVD.
Introduction to Movie Maker
In this Workshop, you will use of Microsoft’s
Movie Maker program.
Objectives
1. Become familiar with the Movie Maker windows
environment.
2. Display and work with Photos from the DVD.
3. Insert music, add titles and captions to
pictures.
4. Use the Automovie Themes and select one to use
5. Share by burning a DVD.
 Movie Maker
Introduction:
Movie Maker Icon
1. Start a New Project.
2. Open a Project.
3. Add your pictures.
4. Save as. (Name your file).
5. Publish or Save list.
6. Review Options and Settings.
7. Exit.

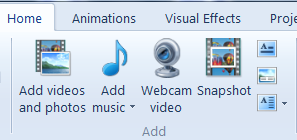
The Home Tab
1. Cut, Copy and Paste.
2. Add Photos.
3. Insert Music.
4. Put in Titles, Captions or Credits.
5. AutomovieThemes quickly changes features
shown automatically.
7. You can Rotate Left or Right 90 degrees, delete or
select all.
8. Burn a DVD.
9. You can send a small movie using E-mail.
10. Movies can be posted on UTube.
Animations
1.Transitions, Duration.
2.Pan and Zoom.

Visual Effects
1. Color and Brightness.
Project
1.Edit Audio Mix or Fit to Music and preview anytime.
2. Aspect Ratio-Wide Screen or Standard.
View
1. Time Zone-Zoom in , Out and Reset.
2. Thumbnail size –Small to Large.
3. Preview in Full Screen.
How do I get Movie Maker
1. Free download from Microsoft or www.download.live.com
2. Click on “Download”
3. Install the software.
How do I use Movie Maker
1. Open Movie Maker from the desktop Icon
Finding Your Photo Files
Click to Browse and select a Folder and Display the Pictures
1. Drag and drop your selections into Movie Maker.
2. Photos will be .jpg or .jpeg file extensions.
3. Audio files will normally be. .asf, .wm and.wma.
Music .mp3.
Starting a Movie Project
On the HomeTab
Click on Add Photos.
Open the folder on the DVD with the Photos you want in the
Project.
Hold the Ctrl key and select each photo or video you want
or hold Ctrl key and hit "A" to select them all.
Click on Open and the files are copied over to Movie Maker.
Continue until you have all the files that you want transferred.
Click on Add Music to include music at the beginning.
To add music at the current point, click the down arrow on Add
Music and click the Add music at the current point.
In the Add Music window open the folder with the music that you
want in your movie, click the file and then click Open.
To remove music, click the music item, and then press Delete.

Continuing a Movie Project
On the HomeTab
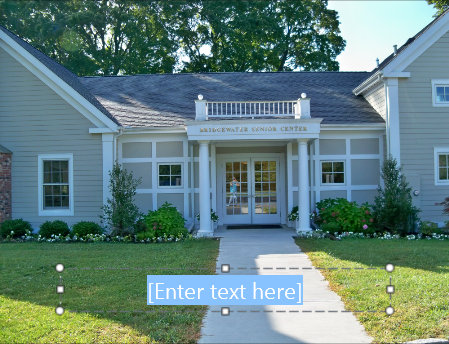
Click on Title in the Add Panel. Type in the title name.
Note the changes you can make in the Font, Paragraph,
Adjust and Effect panels.
Captions appear at the bottom of the movie but can be moved.
Credits appear at the end of the movie.
Continue until you have labeled all the files that you want.
Click on the Automovie Theme to create your initial movie.
Continue to Add andEdit your movie until satisfied.
In the Add window you can place more videos or photos or music in
your movie.
In the Edit window you can Rotate frames, change the Audio mix
Fit to Music, Remove or Select all.

Continuing a Movie Project
Share on You-Tube. On the Home tab, in the Sharing Group, click Publish on You Tube. Enter your YouTube account number and password and click Sign In. Type a title, description and any tags that you want to add to your movie. Select a category, public or private and the click Publish. In Your movie has been published message , click View online.