DVD-R Program Workshop by Carolyn Fisher
Objective:
How to copy or burn pictures to a DVD-R to store and enhance pictures.
1. How a DVD-R can be used to share pictures.
2. Locate and open the DVD drive on your computer.
3. Put the DVD provide into the drive.
4. Eject the DVD.
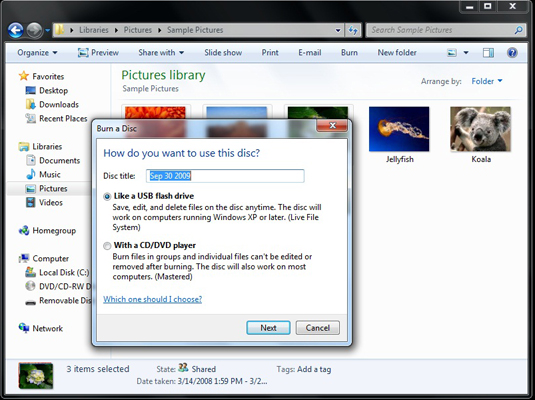
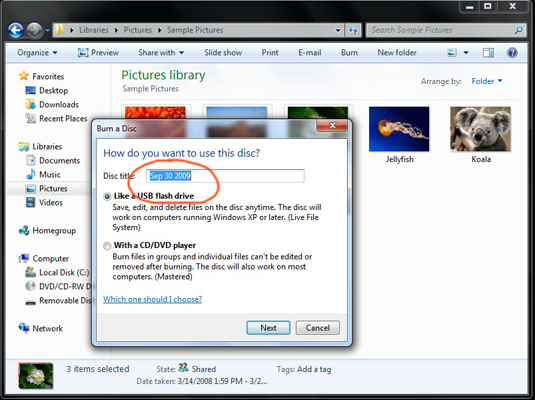
5. Put DVD back in drive and format DVD to be used as a “Flash Drive”
Formatting will take a few seconds.
6. Go to your e-mail. I will e-mail pictures to your address.
7. Download the pictures you will use and transfer them to your
“Pictures Library” in an "New Folder" file that you create.
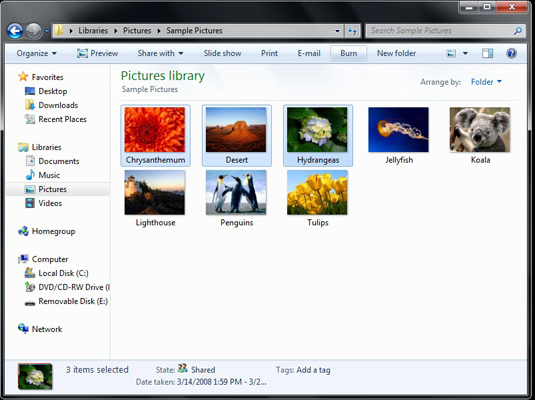
8. Now you are ready to "copy" your pictures to your DVD.
See below for the detailed procedure.
9. Go to Picasa and find your pictures. Now you can enhance the pictures.
Notes:
I will bring in a painting that we can use to practice color matching in Picasa.
Students get to keep the DVD and will still be able to reuse the DVD.
Burning a DVD makes it a permanent file. We will do that in September.
Burning a DVD makes it a permanent file. We will do that in September.
How to Copy Photos to a CD or DVD Using Windows 7's Pictures Library
Not only is the Pictures Library in Windows 7 the best place to view your photos. it's also a great starting point for copying photos to a CD or DVD. CDs and DVDs are great ways to share your memories with friends and family, and in Windows 7, they're simple to create.Head to the computer or office-supply store and pick up a stack of blank CDs or DVDs to match your PC’s drive. Remember that if you need to copy a lot of images, a DVD is a better bet; it can store five times as many photos as a CD.Once you have your discs, you're ready to start.


